User (and organization) and Device (and Device tag)
To create user and device by CSV file, create CSV file following below specification and format.
CSV file specifications
-
The first row is “header” instructed at CSV file format. By this format, you can create or update user and device as below cases;
-
Create and update Device with User association
- Create and update Device only
- Create and update User only
- Header has no space
- CSV file header and values are case sensitive. However, only Device Identifier is case insensitive. (e.g., "DEVICE01" and "device01" are considered identical.)
CSV file format
M = Mandatory column
O = Optional column (*1)
Blank = Need to set blank for User only or Device only batch processing
|
Header |
Description |
All |
Device |
User |
|
UserName |
Unique ID for User |
M |
M |
M |
|
Name |
User’s Name |
O |
M |
O |
|
EmailAddress |
User’s Description |
O |
M |
O |
|
UserDescription |
User’s Email Address |
O |
M |
O |
|
Organizations |
User’s Organization ID. Organization should be created before uploading CSV file. In order to register multiple organizations, please use “|” as a delimiter. |
O |
M |
O |
|
Identifier |
Unique ID for Device |
M |
M |
M |
|
Template |
Template name to assign the device(s). Template should be created before uploading CSV file. |
O |
O |
M |
|
Code |
Passcode for check-in process. If blank, system generates random code automatically |
O (*2) |
O (*2) |
M |
|
OS |
“ios”, “android” or “windows”.(small letter only). Cannot update this field after data was created. |
M |
M |
M |
|
DeviceTags |
Device Tag. It should be created before uploading CSV file. In order to register multiple Device Tags, please use “|” as a delimiter. |
O |
O |
|
|
WifiMac |
Wi-Fi MAC Address for Enrollment restriction (iOS and Android only) |
O |
O |
M |
|
IMEI |
IMEI for Enrollment restriction (iOS and Android only) |
O |
O |
M |
|
MEID |
MEID for Enrollment restriction (iOS and Android only) |
O |
O |
M |
|
UDID |
UDID for Enrollment restriction (iOS only) |
O |
O |
M |
|
Serial |
Hardware serial for Enrollment restriction (Windows only) |
O |
O |
M |
|
ExpirationDays |
Day(s) for Enrollment expiration |
O (*3) |
O (*3) |
M |
|
DisplayName |
Nickname for Device |
O |
O |
M |
|
Description |
Description for Device |
O |
O |
M |
|
RegistrationEmail |
Email Address for check-in (Check in Email is sent every time of creating or updating device by both CSV file or input form) |
O |
O |
M |
*1 “Blank” field at optional column works as below.
|
CSV Value |
Create |
Update |
|
Blank |
Set blank value |
Remove original value |
|
Not Blank |
Use CSV value |
Update with CSV value |
*2 “Blank” for Code column works as below.
|
CSV Value |
Create |
Update |
|
Blank |
Generate random code |
No change |
|
Not Blank |
Use CSV value |
Update with CSV value |
*3 “Blank” for ExpirationDays columns works as below.
|
CSV Value |
Create |
Update |
|
Blank |
Set 7 days |
Set 7 days |
|
Not Blank |
Use CSV value |
Update with CSV value |
To update device information, it depends on the enrollment status as below.
|
Check-in Status |
Behavior |
|
Enrolling Expired |
Can update columns except “os” |
|
Enrolled |
Can update columns except below columns os, Code, WifiMac, IMEI, MEID, UDID, ExpirationDays, RegistrationEmail |
|
Withdrawn |
Cannot update any columns (need to create new device) |
CSV file samples
Sample 1: Create User and Device
|
UserName,Name,EmailAddress,UserDescription,Identifier,Template,Code,OS,WifiMac,IMEI,MEID,UDID,Serial,ExpirationDays,DisplayName,Description,RegistrationEmail user0001,Test User 1,user0001@example.com,User description 1,apple001,,,ios,,,,,,,iOS Device 1,, user0002,Test User 2,user0002@example.com,User description 2,apple002,,,ios,,,,,,,iOS Device 2,, user0003,Test User 3,user0003@example.com,User description 3,google001,,,android,,,,,,,Android Device 1,, user0004,Test User 4,user0004@example.com,User description 4,google002,,,android,,,,,,,Android Device 2,, user0005,Test User 5,user0005@example.com,User description 5,ms001,,,windows,,,,,,,Windows Device 1,, user0006,Test User 6,user0006@example.com,User description 6,ms002,,,windows,,,,,,,Windows Device 2,, |
Sample 2: Create Device only
|
UserName,Name,EmailAddress,UserDescription,Identifier,Template,Code,OS,WifiMac,IMEI,MEID,UDID,Serial,ExpirationDays,DisplayName,Description,RegistrationEmail ,,,,apple001,,,ios,,,,,,,iOS Device 1,, ,,,,apple002,,,ios,,,,,,,iOS Device 2,, ,,,,google001,,,android,,,,,,,Android Device 1,, ,,,,google002,,,android,,,,,,,Android Device 2,, ,,,,ms001,,,windows,,,,,,,Windows Device 1,, ,,,,ms002,,,windows,,,,,,,Windows Device 2,, |
Sample 3: Create User only
|
UserName,Name,EmailAddress,UserDescription,Identifier,Template,Code,OS,WifiMac,IMEI,MEID,UDID,Serial,ExpirationDays,DisplayName,Description,RegistrationEmail user0001,Test User 1,user0001@example.com,User description 1,,,,,,,,,,,,, user0002,Test User 2,user0002@example.com,User description 2,,,,,,,,,,,,, user0003,Test User 3,user0003@example.com,User description 3,,,,,,,,,,,,, user0004,Test User 4,user0004@example.com,User description 4,,,,,,,,,,,,, user0005,Test User 5,user0005@example.com,User description 5,,,,,,,,,,,,, user0006,Test User 6,user0006@example.com,User description 6,,,,,,,,,,,,, |
Upload CSV file
Step
1. Go to CONFIG -> Device -> Import
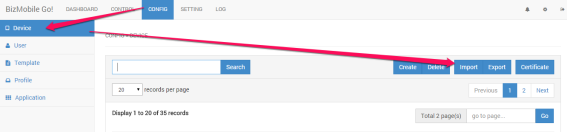
2. Put CSV file to “CLICK HERE OR DROP CSV FILE HERE” area, or click this area to open file selection screen.
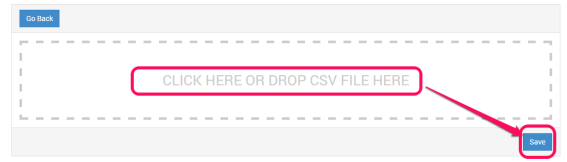
3. Press Save
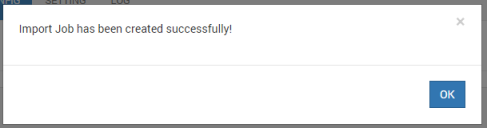
4. Click OK at below message
5. System shows a new job at the import history table as status=PENDING. After a few seconds, press refresh button on your browser.
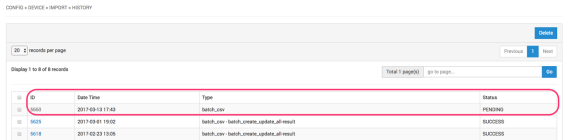
6. After refresh, Status is changed to SUCCESS, and ID number is changed to hyperlink. To check import result, click hyperlink to download import result CSV file.
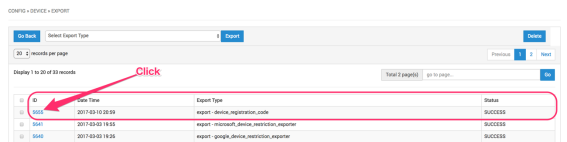
History of Import CSV
To check import history, please see import history list at Import screen (please scroll down).
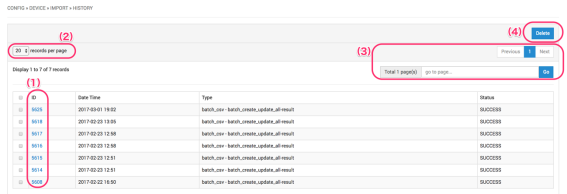
(1) Click “ID” value to download “Import result” CSV file. This is the same file at step 5.
(2) Selectable item numbers per page … 20, 5.x and 100 items.
(3) Move to other page if history has multiple pages
(4) Delete Import result. Please tick the left side of the item you want to delete in the list/